
Linux-pxe
linux-PXE (Preboot eXecution Environment)搭建完整过程
pxe 流程
1,客户端启动系统,选择从网卡启动
2,从dhcp服务器中获取到ip地址等信息。
3,还从dhcp获取到了tftp server及网络引导程序pxelinux.0
4,读取到tftp 服务器中的(/var/ib/tftpboot/)pxelinux.0到内存中
5,在内存中执行引导程序,
6,读取引导程序中的配置文件。(/var/lib/tftpboot/pxelinux.cfg/default)
7,读取default中的内容
实验环境centos7.9
ens33 192.168.5.115/24 nat vmnet8
ens36 192.168.11.1/24 hostonly vmnet2
1,安装dhcp,tftp-server
[root@client ~]# yum -y install dhcp tftp-server2,拷贝dhcp 模板配置文件到/etc/dhcp/
[root@client dhcp]# cp /usr/share/doc/dhcp-4.2.5/dhcpd.conf.example dhcpd.conf

[root@client dhcp]# vim dhcpd.conf

# A slightly different configuration for an internal subnet.

subnet 192.168.11.0 netmask 255.255.255.0 { #子网域

range 192.168.11.10 192.168.11.100; # ip地址段

option domain-name-servers 192.168.5.2, 114.114.114.114; #dns 地址

option domain-name "emporer.com"; #search 域 表现为/etc/resolv.conf中

option routers 192.168.11.1; #默认路由,网关

option broadcast-address 192.168.11.255; #广播地址

default-lease-time 600; #租约

max-lease-time 7200;

}
3,服务启动,,需注意dhcp 服务器应该为网关地址或者为同一段网络中。监听UDP 67
[root@client dhcp]# netstat -ntupla |grep :67

udp 0 0 0.0.0.0:67 0.0.0.0:* 2294/dhcpd
4,指定dhcp服务器监听在那个接口,例服务器有多张网卡时。
编辑/usr/bin/systemd/system/dhcpd.service 添加指定的网卡为ens36
[Unit]

Description=DHCPv4 Server Daemon

Documentation=man:dhcpd(8) man:dhcpd.conf(5)

Wants=network-online.target

After=network-online.target

After=time-sync.target

[Service]

Type=notify

ExecStart=/usr/sbin/dhcpd -f -cf /etc/dhcp/dhcpd.conf -user dhcpd -group dhcpd --no-pid ens36 #ens36

[Install]

WantedBy=multi-user.target
5,安装xinetd
[root@client ~]# yum install xinetd6,配置tftp 启动
vim /etc/xinetd.d/tftp

disable = no
7,启动tftp 监听UDP 69端口
[root@client ~]# netstat -ntplua |grep :69

udp 0 0 0.0.0.0:69 0.0.0.0:* 1245/xinetd

[root@client ~]#
8,添加dhcp 配置文件,全局配置中新加两行
vim /etc/dhcpd/dhcpd.conf

next-server 192.168.11.1; #指定tftp 服务器地址为192.168.11.1

filename "pxelinux.0"; #网络引导程序
9,拷贝pxelinux.0到/var/lib/tftpboot/下
需安装一个包
[root@client tftpboot]# yum provides "*/pxelinux.0"

已加载插件:fastestmirror, langpacks, priorities

Loading mirror speeds from cached hostfile

* centos-nfs-ganesha28: mirrors.ustc.edu.cn

* elrepo: hkg.mirror.rackspace.com

* epel: mirrors.tuna.tsinghua.edu.cn

12 packages excluded due to repository priority protections

syslinux-4.05-15.el7.x86_64 : Simple kernel loader which boots from a FAT filesystem

源 :base

匹配来源:

文件名 :/usr/share/syslinux/pxelinux.0

syslinux-tftpboot-4.05-15.el7.noarch : SYSLINUX modules in /var/lib/tftpboot, available for network booting

源 :base

匹配来源:

文件名 :/var/lib/tftpboot/pxelinux.0

yum -y install syslinux-tftpboot
查找这个pxelinux.0文件拷贝至tftpboot中
[root@client tftpboot]# rpm -ql syslinux-tftpboot.noarch 0:4.05-15.el7 |grep pxelinux

/var/lib/tftpboot/gpxelinux.0

/var/lib/tftpboot/pxelinux.0
10,挂载系统光盘。拷贝开机菜单isolinux.cfg 到/var/lib/tftpboot/pxelinux.cfg/目录下
mkdir /var/lib/tftpoot/pxelinux.cfg
[root@client isolinux]# cp isolinux.cfg /var/lib/tftpboot/pxelinux.cfg/default
[root@client isolinux]# cd /var/lib/tftpboot/pxelinux.cfg/
[root@client pxelinux.cfg]# ls
default
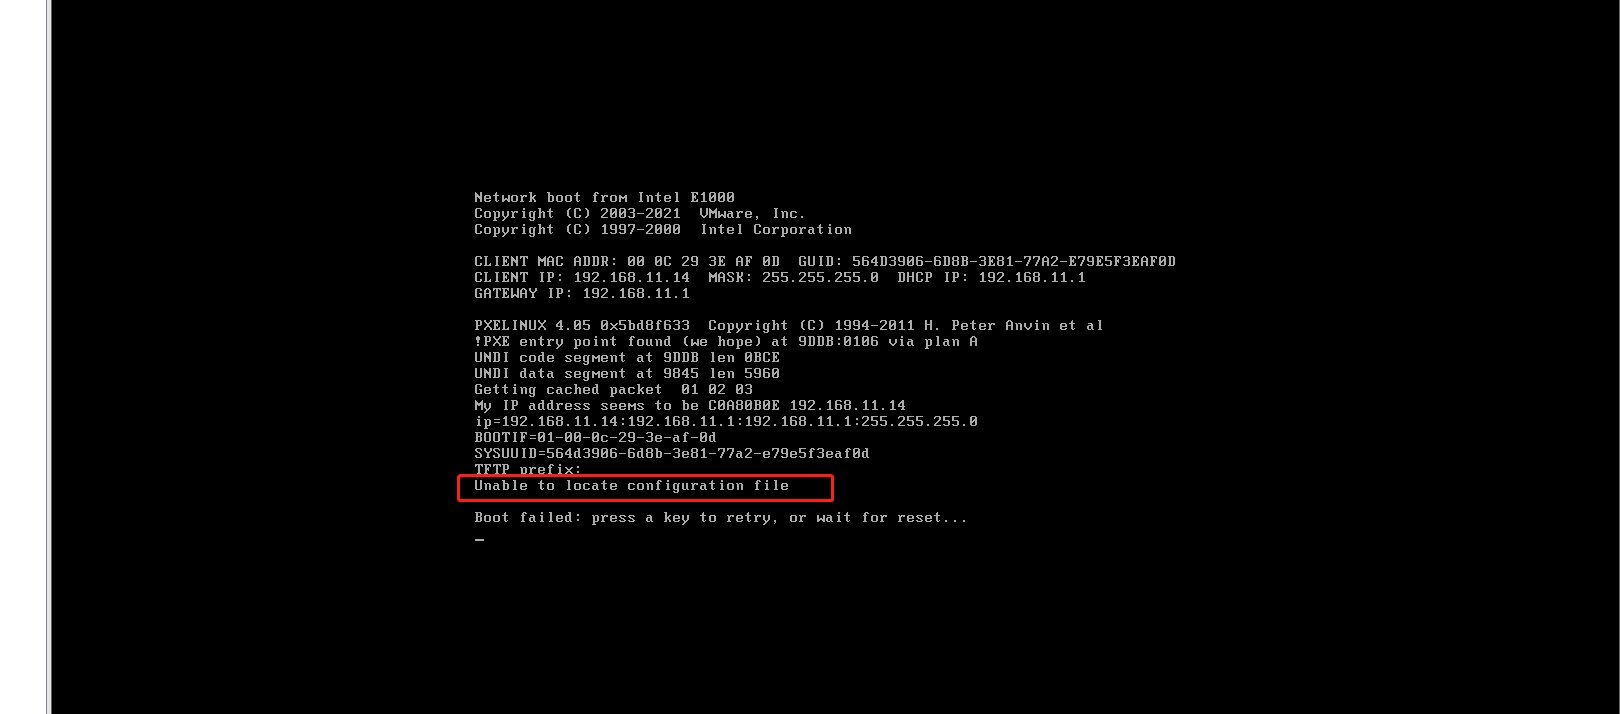
[root@client pxelinux.cfg]#11,这时启动客户端会提示没有配置文件中的一些内容。光盘中有。 就是isolinux这个文件中的内容
 拷贝启动文件。
[root@client ~]# mount /dev/sr0 /mnt/
mount: /dev/sr0 写保护,将以只读方式挂载
[root@client ~]# cd /mnt/isolinux/
[root@client isolinux]# ls
boot.cat boot.msg grub.conf initrd.img isolinux.bin isolinux.cfg memtest splash.png TRANS.TBL vesamenu.c32 vmlinuz
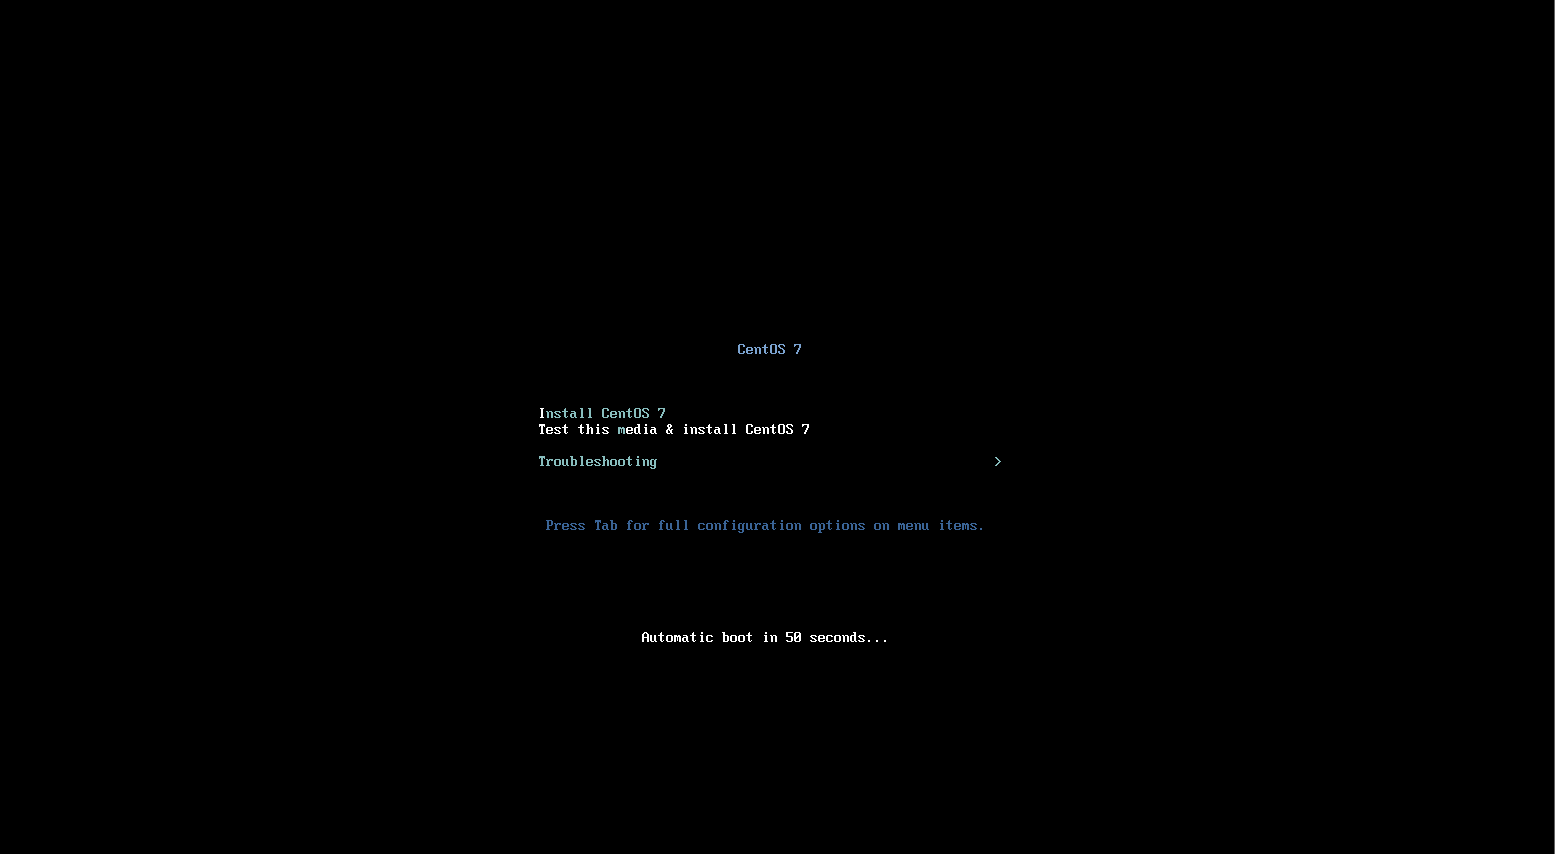
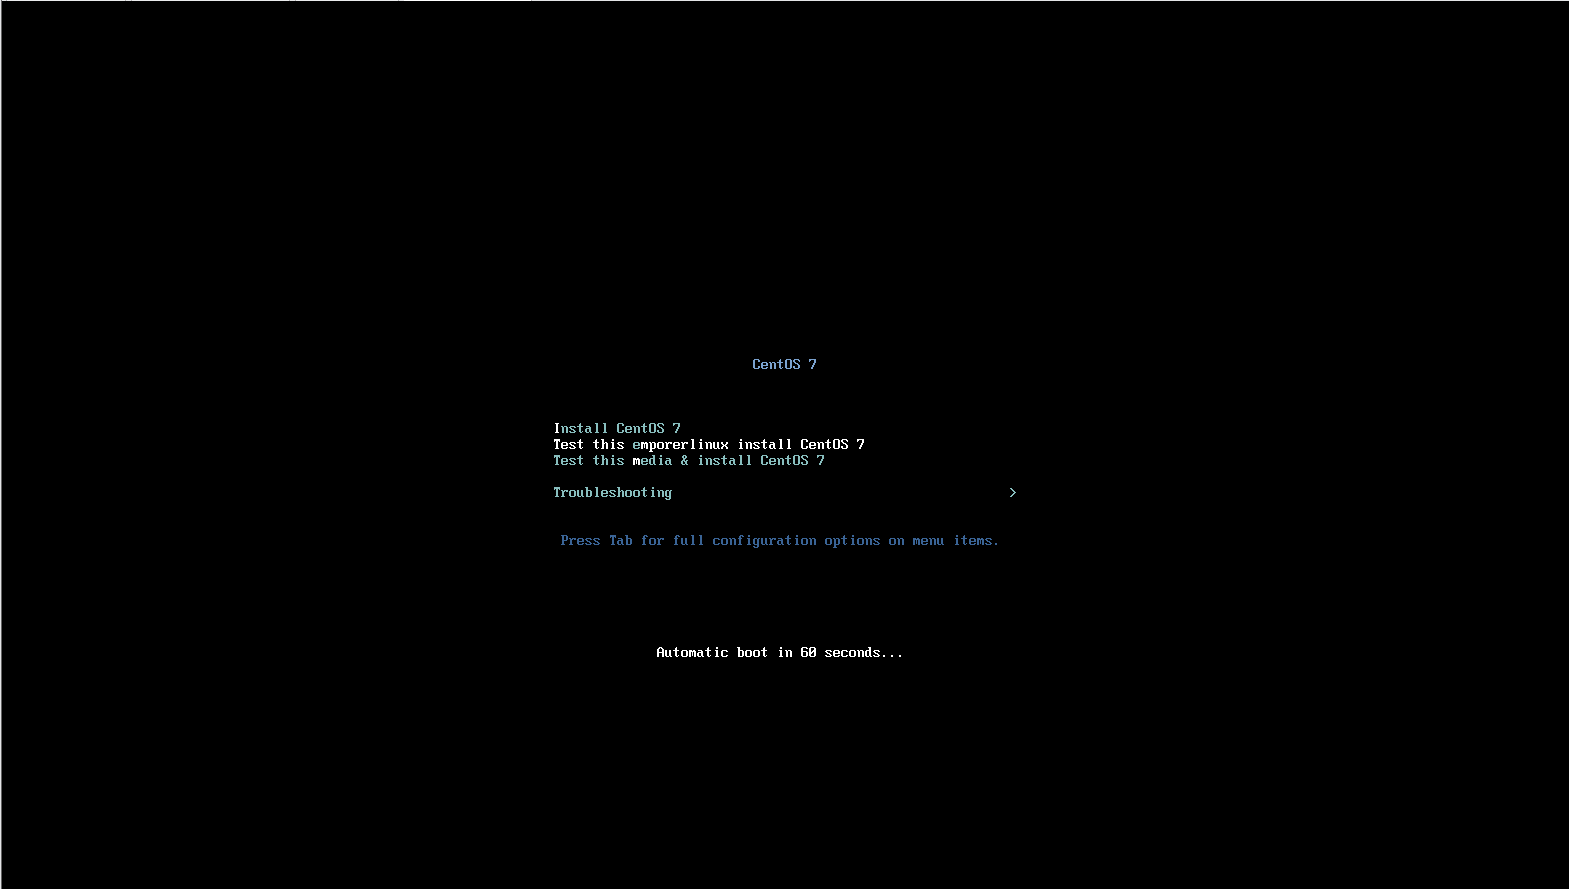
[root@client isolinux]# cp * /var/lib/tftpboot/12,启动客户端,有开机菜单选项。但是并没有系统。
13, vmlinuz 内核 ,initrd.img 驱动程序,(一定找对应的文件,匹配OS的,这两个文件不通用,就是装那个操作系统就去找这两个文件) 光盘的/images/pxeboot/中一定有这两个文件
14,安装自动system-config-kickstart 这个包,提供无人安装的脚本
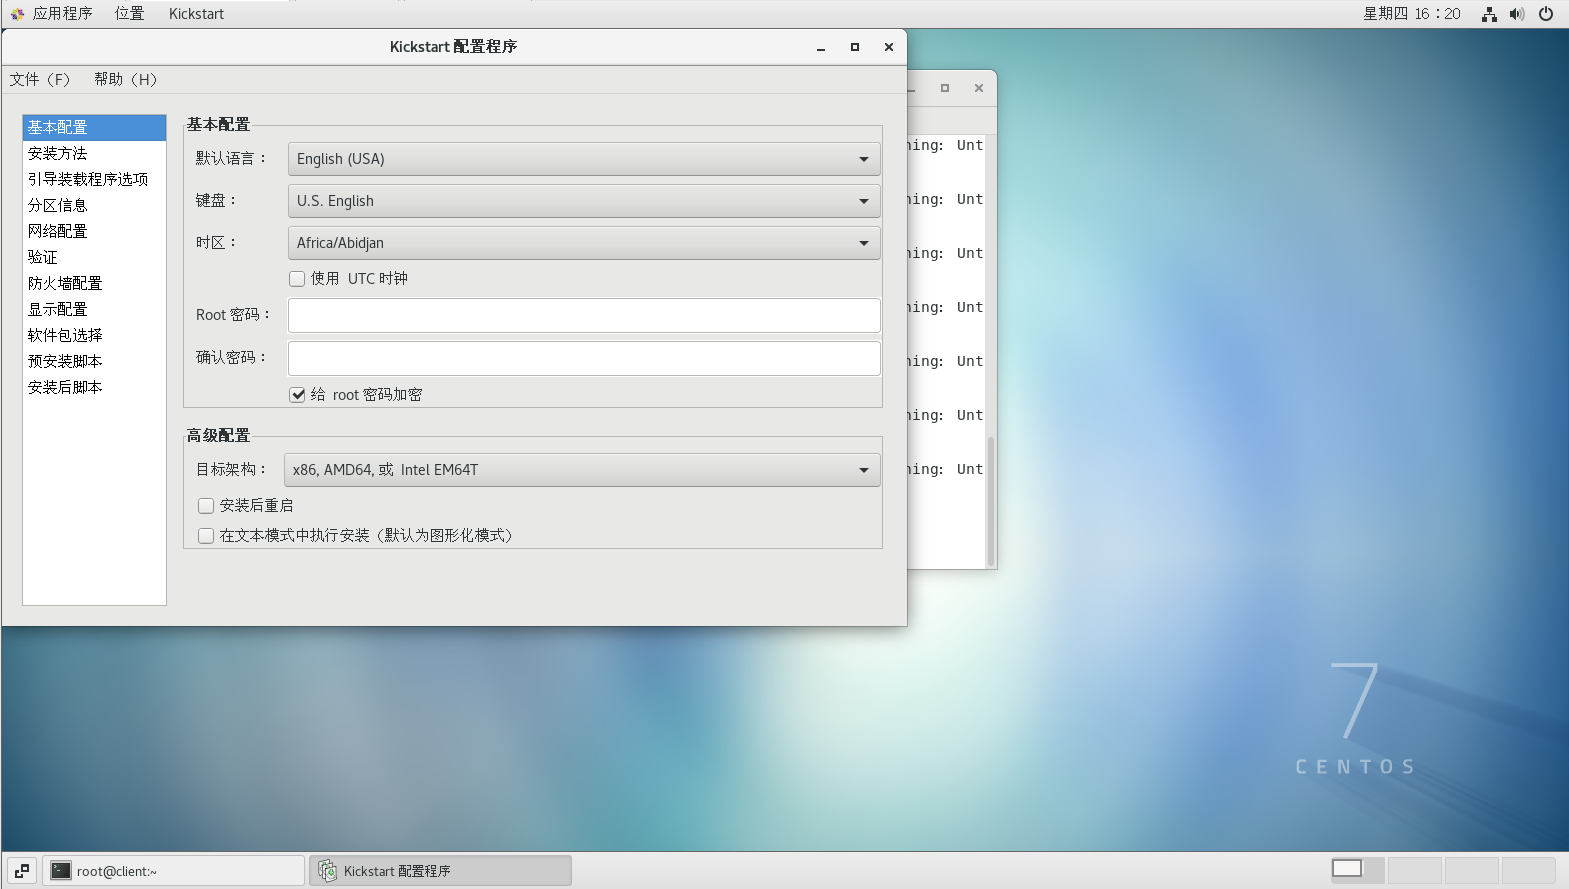
[root@client ~]# yum -y install system-config-kickstart启动交互配置
[root@client ~]# system-config-kickstart选择键盘,语言,密码,安装后重启等。全新安装。安装源为http,安装新的引导程序,在主引导记录中安装新的引导程序,分区,清除主引导信息,删除现存分区,初始化磁盘标签,网卡信息,网卡名称eth0,dhcp获取ip,防火墙,selinux。。图形界面安装。。安装需要的包,系统基本base,,桌面gnome 字体fonts ,xwindows
15,安装httpd,挂载光盘到默认的http目录/var/www/html/ 下创建一个目录pub
[root@client ~]# yum -y install httpd

[root@client ~]# mkdir /var/www/html/pub

[root@client ~]# umount /dev/sr0

[root@client ~]# mount /dev/sr0 /var/www/html/pub/

mount: /dev/sr0 写保护,将以只读方式挂载

[root@client ~]#
16,其实就是把镜像放到http服务器中/pub下,开机自动挂载光盘到http
vim /etc/fstab
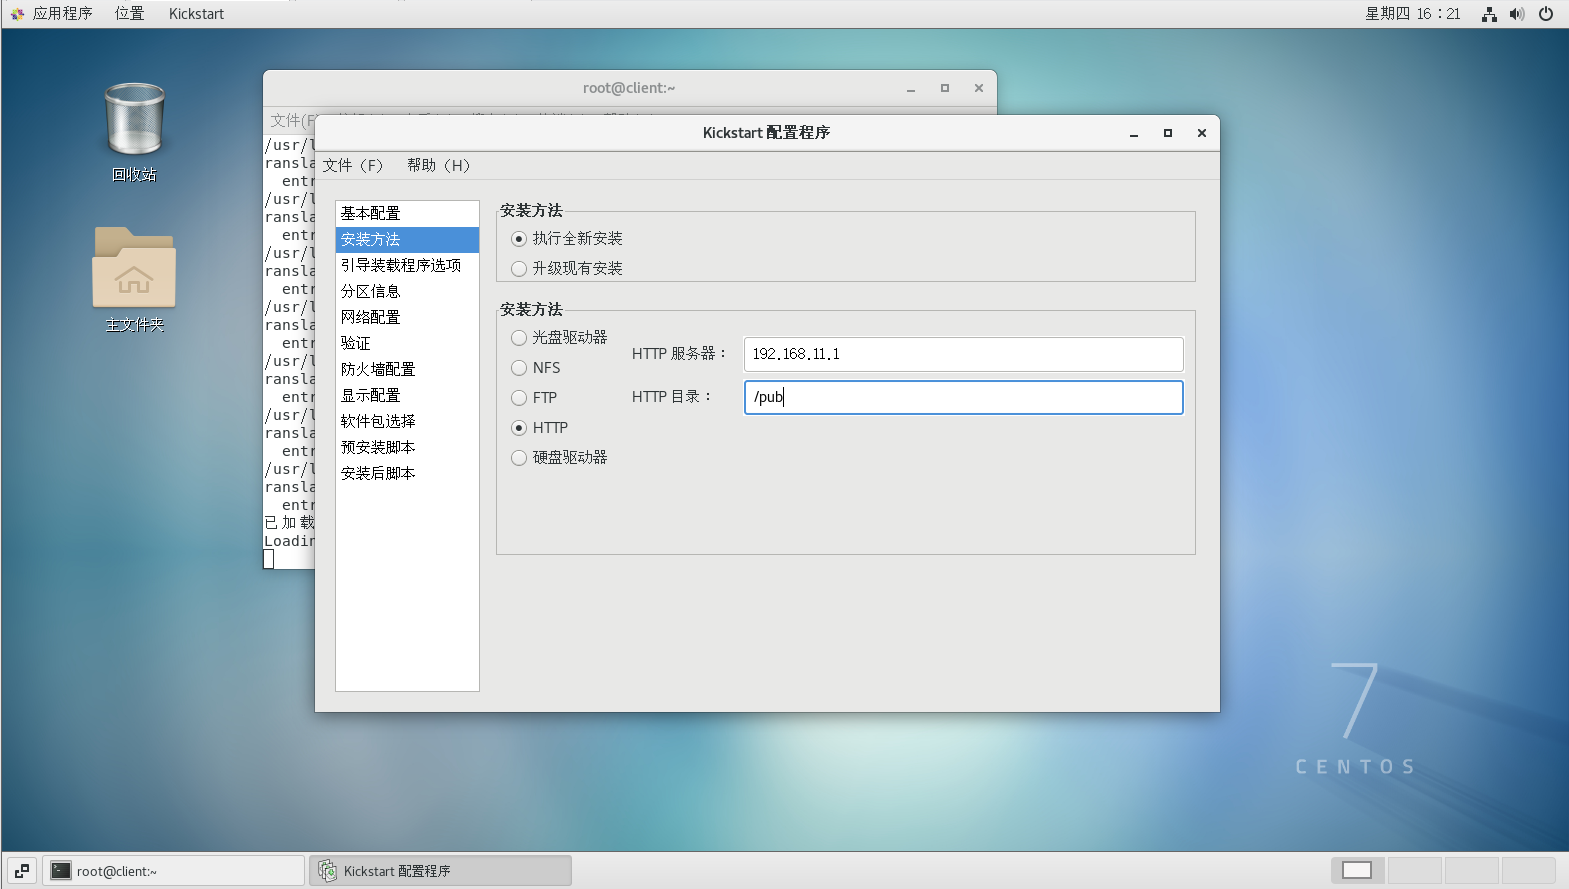
/dev/sr0 /var/www/html/pub iso9660 defaults,loop 0 017,配置kickstart 安装方式为http ,输入ip地址,安装源目录为/pub
18,分区,自动化分区,或手动分区,设置网卡,防火墙,selinux,图形界面是否启用。选择需要安装的包
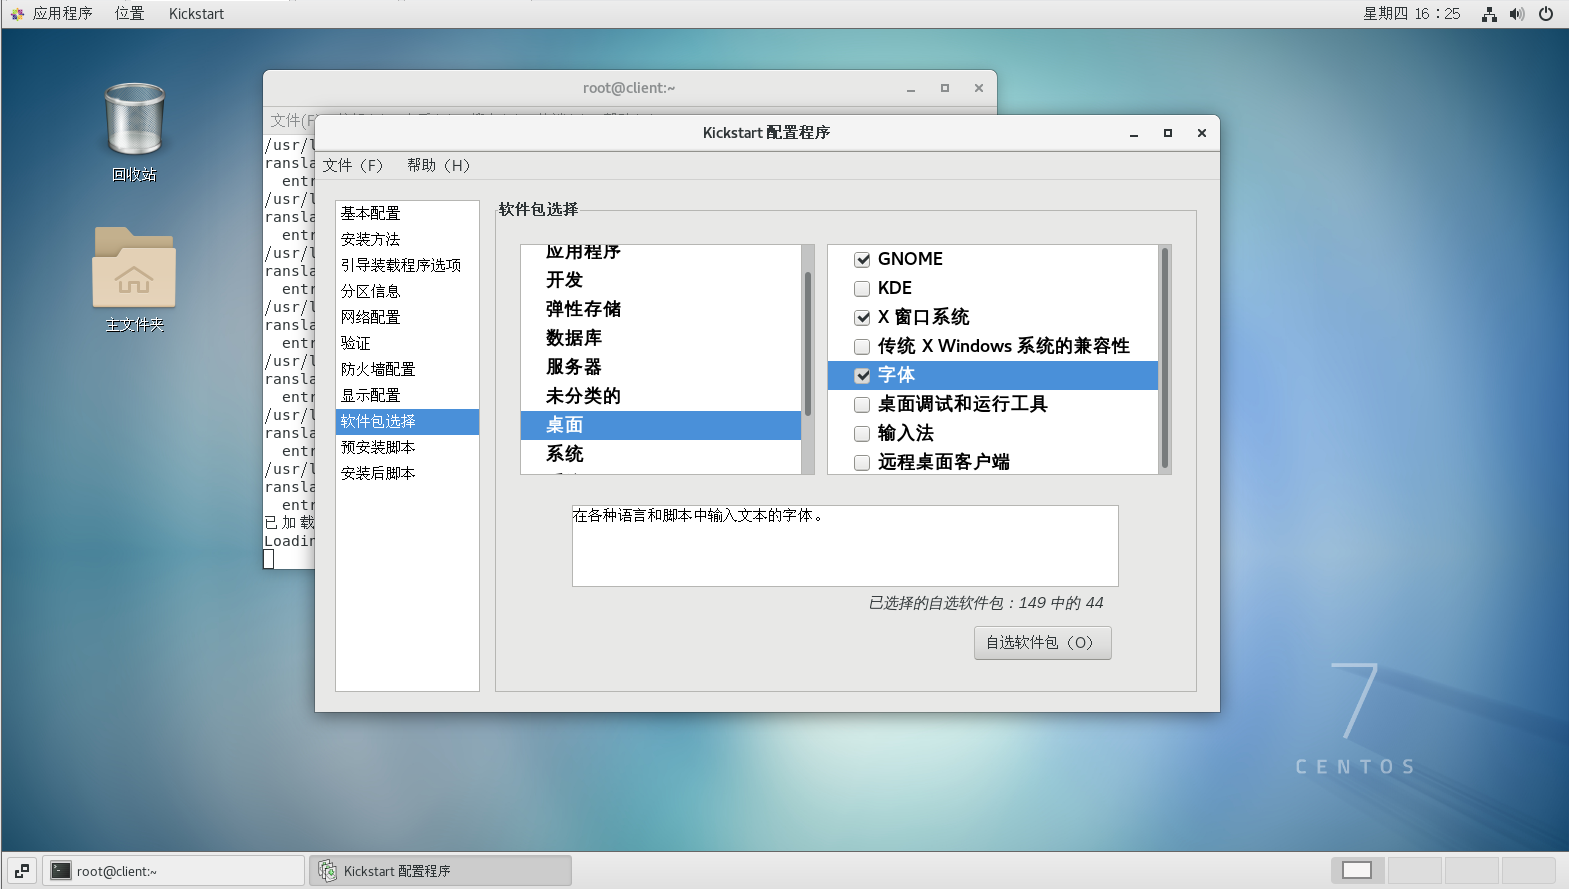
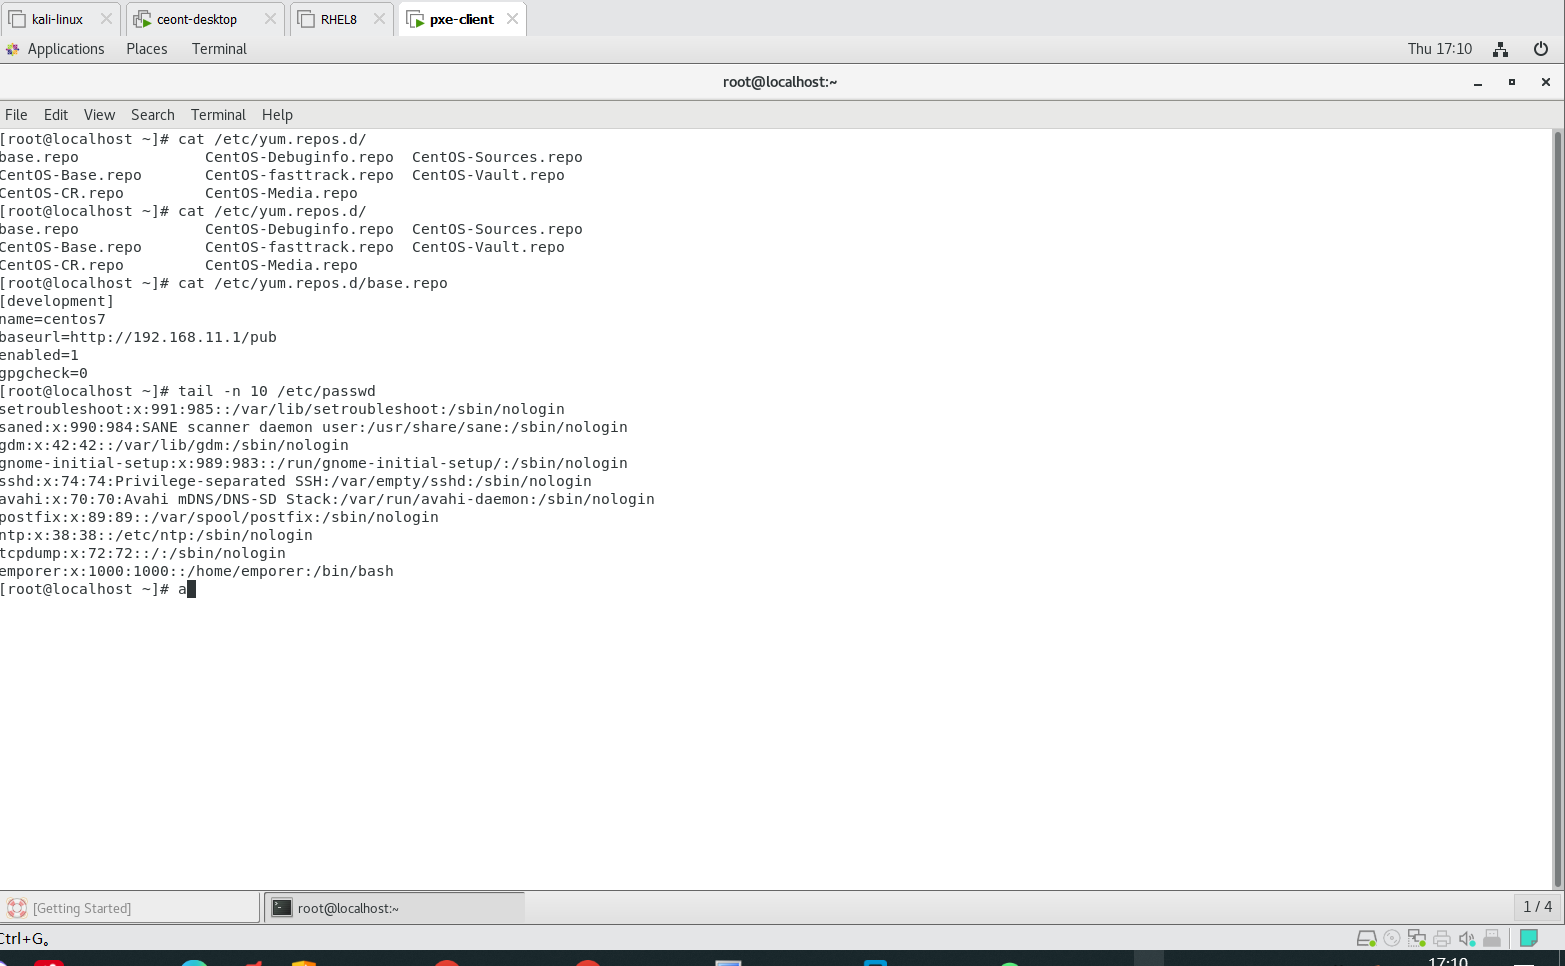
19,需手动选择安装的软件包。。这里的yum源配置应该为 指的是pxe server这台服务的yum 源
[development] 这个是重点,开发搞的,不要问为什么,必须为这个名字,不然system-config-kickstart 中会没有包
[root@client yum.repos.d]# cat /etc/yum.repos.d/dvd.repo

[development]

name=centos7

baseurl=http://192.168.11.1/pub

enabled=1

gpgcheck=0
20,保存kickstart 文件 ,配置kickstart 文件后放到本机http中。
[root@client ~]# cd /var/www/html/ks

[root@client ks]# ls

[root@client ks]# cp /root/kickstart.cfg ./
21,更改/var/lib/tftp/pxelinux.cfg/default
拷贝5行来更改
label emporerlinux

menu label Test this ^emporerlinux install CentOS 7

menu default ##默认开机从这里启动

kernel vmlinuz

append initrd=initrd.img ks=http://192.168.11.1/ks/kickstart.cfg ##改为http服务器中的ks文件来装系统
大致的kickstart 文件:
[root@client ks]# cat kickstart.cfg

#platform=x86, AMD64, 或 Intel EM64T

#version=DEVEL

# Install OS instead of upgrade

install

# Keyboard layouts

keyboard 'us'

# Root password

rootpw --iscrypted $1$SOlM2DHA$2PGYiozNfL4hXfU84vwaZ/

# System language

lang en_US

# System authorization information

auth --useshadow --passalgo=sha512

# Use graphical install

graphical

firstboot --disable

# SELinux configuration

selinux --permissive

# Firewall configuration

firewall --disabled

# Network information

network --bootproto=dhcp --device=eth0

# Reboot after installation

reboot

# System timezone

timezone Asia/Shanghai

# Use network installation

url --url="http://192.168.11.1/pub"

# System bootloader configuration

bootloader --location=none

# Clear the Master Boot Record

zerombr

# Partition clearing information

clearpart --all --initlabel

# Disk partitioning information

part /boot --fstype="xfs" --size=200

part swap --fstype="swap" --size=2048

part / --fstype="xfs" --size=1

%post --interpreter=/bin/bash

cat >> /etc/yum.repos.d/base.repo <<EOF

[development]

name=centos7

baseurl=http://192.168.11.1/pub

enabled=1

gpgcheck=0

EOF

useradd emporer

echo passwd |passwd --sdtin emporer

%end

%packages

@base

@fonts

@gnome-desktop

@x11

%end
22,启动所有服务,httpd ,dhcpd,xinetd。服务器开机 自动安装!!!
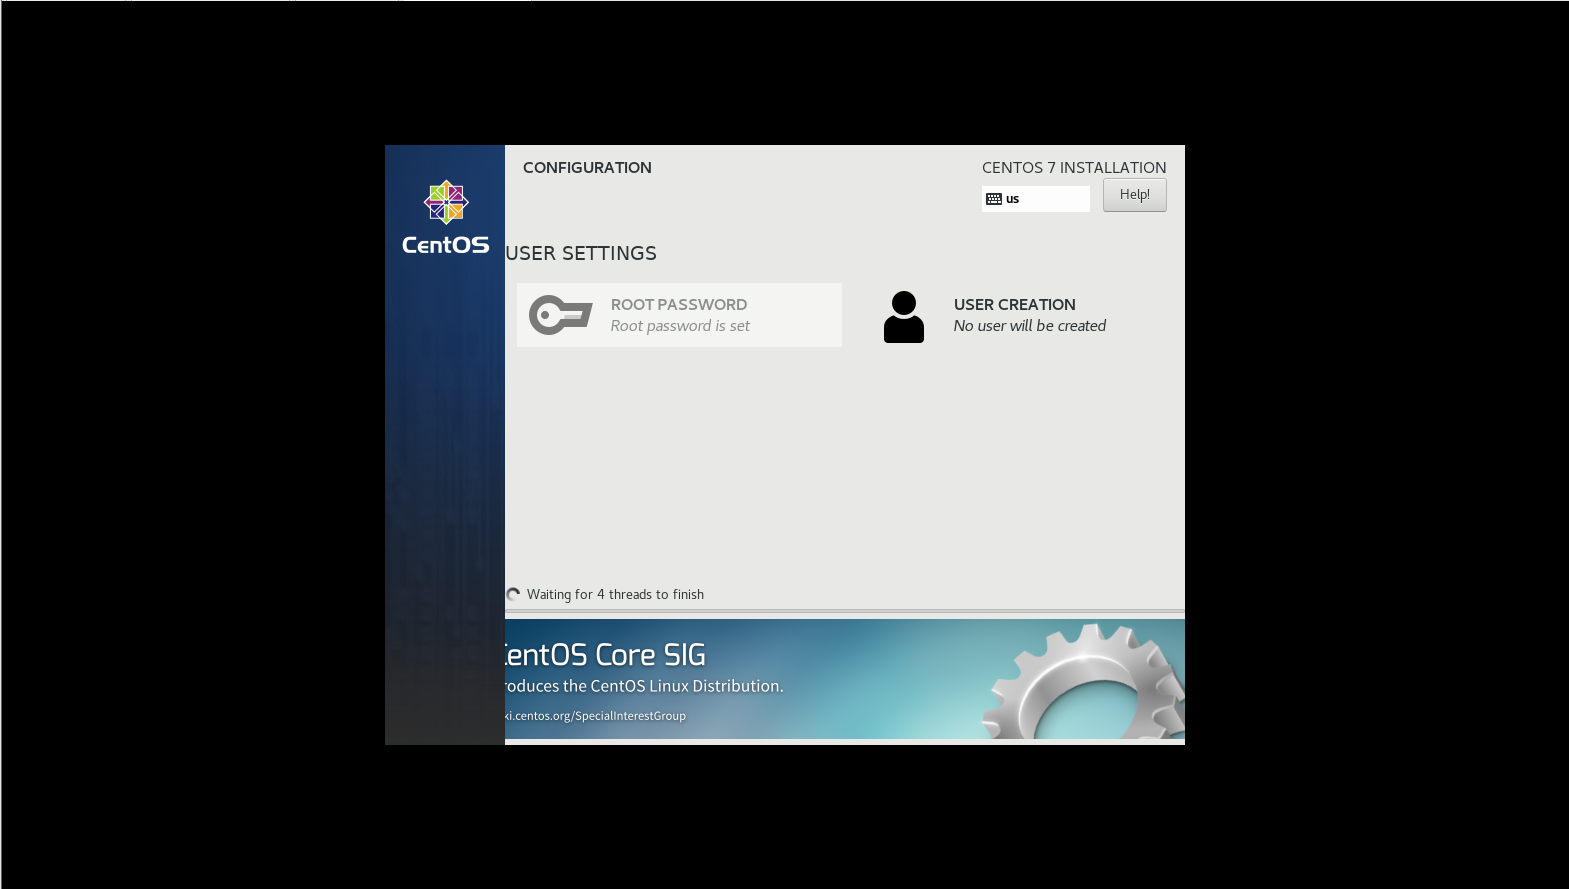
安装完毕:
附加:
可以将系统盘定义逻辑卷
在 Kickstart 文件中定义系统盘为逻辑卷(LVM)时,需要使用 part 和 volgroup 两个命令来进行分区和逻辑卷组的设置
zerombr
# Clear all existing partitions on the system disk

clearpart --all --initlabel

# Define the partition layout for the system disk

part pv.01 --size=1 --grow

# Create the volume group using the partition defined above

volgroup vg_system pv.01

# Define the logical volumes within the volume group

logvol / --vgname=vg_system --size=10240 --name=lv_root

logvol swap --vgname=vg_system --size=2048 --name=lv_

swap logvol /home --vgname=vg_system --size=1 --grow --name=lv_home

# Specify the bootloader installation location (optional)

bootloader --location=mbr
解释:
zerombr:清除主引导记录 (MBR)。如果系统盘中存在旧的分区表,这个命令会清除它们,以便重新定义分区。clearpart --all --initlabel:清除系统盘上的所有分区,并初始化一个新的分区表。part pv.01 --size=1 --grow:创建一个 1MB 大小的分区,并将其作为物理卷 (PV)。使用--grow参数允许分区在整个可用空间上进行扩展。volgroup vg_system pv.01:创建名为vg_system的逻辑卷组 (VG),并将上面创建的物理卷pv.01添加到逻辑卷组中。logvol:用于创建逻辑卷 (LV)。在上面的示例中,我们创建了三个逻辑卷:lv_root、lv_swap和lv_home。logvol / --vgname=vg_system --size=10240 --name=lv_root:创建一个 10GB 大小的逻辑卷用作根目录/。logvol swap --vgname=vg_system --size=2048 --name=lv_swap:创建一个 2GB 大小的逻辑卷用作交换空间。logvol /home --vgname=vg_system --size=1 --grow --name=lv_home:创建一个逻辑卷用作/home,并将其大小设置为剩余的所有可用空间。
bootloader --location=mbr:指定引导加载器 (bootloader) 安装到主引导记录 (MBR)。这是可选的,如果不指定,默认情况下引导加载器会被安装在 MBR。
可以使除了swap boot分区外,只让根分区做逻辑卷
# Clear the Master Boot Record (MBR) on the system disk

zerombr

# Clear all existing partitions on the system disk

clearpart --all --initlabel

# Define the partition layout for the system disk

part /boot --fstype=ext4 --size=1024

part swap --size=2048

part pv.01 --size=1 --grow

# Create the volume group using the partition defined above

volgroup vg_system pv.01

# Define the logical volume for the root partition using remaining space

logvol / --vgname=vg_system --size=1 --grow --name=lv_root

# Specify the bootloader installation location (optional)

bootloader --location=mbr